Files
-
- 10 MB
- Download
Introduction
Welcome to the Easy Translator Tutorial! Here, you'll learn how to create the Easy Translator workspace and how to develop a Workspace App using FME Flow (formerly FME Server). The Easy Translator Workspace leverages a dynamic workspace, and the app is designed to translate data to and from any FME-supported format. With FME's generic reader, format identification is streamlined based on file extension, while the FME Flow Data Streaming service efficiently delivers output data to the user.
Requirements
Before starting this guide, we highly recommend that you have completed at least one of the Getting Started with FME Form articles and familiarize yourself with published parameters and FME Flow Apps.
Step-By-Step Instructions
Part 1: Create the Easy Translator Workspace
In part 1 you will learn how to create the Easy Translator workspace in FME Workbench.
1. Open FME Workbench
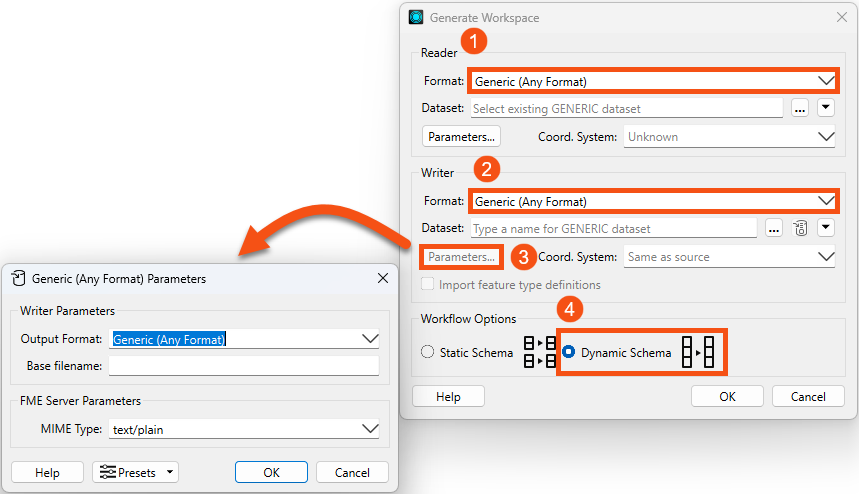
Open FME Workbench and on the Get Started page, click on Generate Workspace. Alternatively, you can also click on File > Generate Workspace.
Fill out the dialog window using the below specifications, then click OK:
- Reader Format: Generic (Any Format)
- Writer Format: Generic
-
Writer Parameters:
- Output Format: Generic (Any Format)
- Workflow Options: Dynamic Schema
Your workspace should now have a dynamic reader and a dynamic writer ready on the canvas.

2. Adjust Current User Parameters
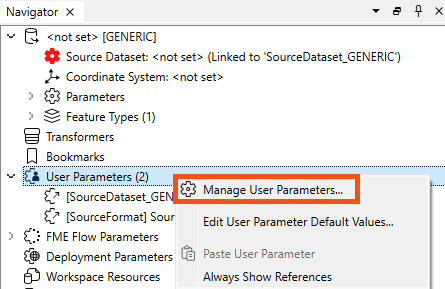
In the Navigator window on the left, right-click on User Parameters and select Manage User Parameters. You will create and adjust a total of six user parameters by the end of this tutorial.
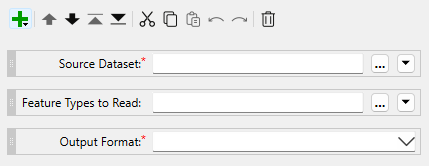
In the Parameter Manager, there should be four user parameters set up already since the workspace was generated. Let's keep and adjust three user parameters: Source Dataset, Feature Types to Read, and Output Format. Delete the Destination Folder parameter using the trashcan icon.
Now, adjust the Feature Types to Read and the Output Format parameters according to the below specifications. By adjusting these parameters, users will have a list of data formats to select from, allowing them to choose the format to which their data will be translated to.
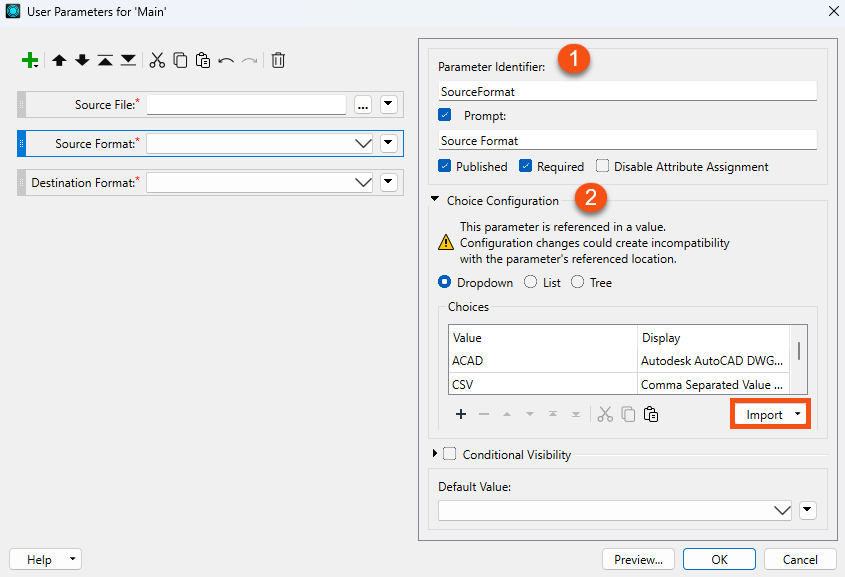
Feature Type to Read parameter
- Parameter Identifier: SourceFormat
- Prompt: Source Format
- Parameter: Published, Required
- Choice Configuration: Dropdown
- Choices: ACAD, CSV, GEOJSON, GML, GPX, IGDS, MIF, MITAB, OGCKML, SDF3, SHAPEFILE, SQLITE3FDO - You can use Import from Reader to quickly search for them as well.
Output Format parameter
- Parameter Identifier: DestinationFormat
- Prompt: Destination Format
- Parameter: Published, Required
- Choice Configuration: Dropdown
- Choices: ACAD, CSV, GEOJSON, GML, GPX, IGDS, MIF, MITAB, OGCKML, SDF3, SHAPEFILE, SQLITE3FDO.
3. Create New User Parameters
Now, let's create three new user parameters, which are designed to allow users to input the coordinate system of their file, if known, and name their destination file.
The first new User Parameter:
- Type: Coordinate System
- Parameter Identifier: COORDSYS
- Prompt: Input Coordinate System
- Parameter: Published
-
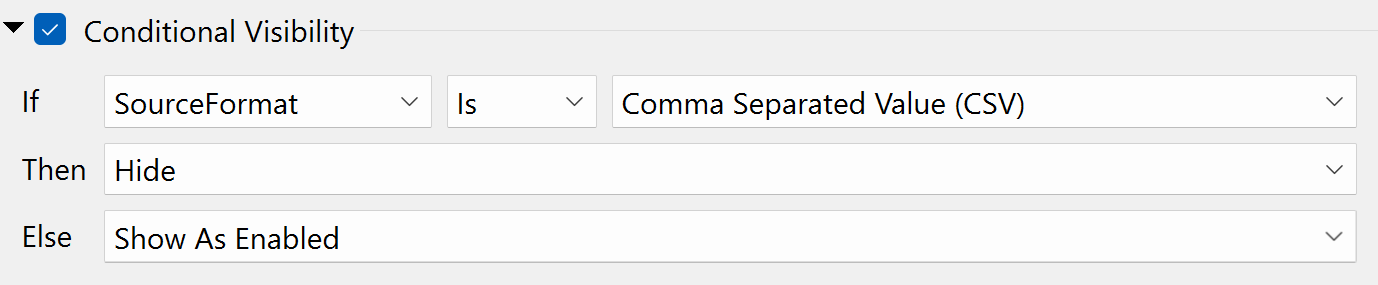
Conditional Visibility:
If SourceFormat Is Comma Separated Value (CSV)
Then Hide
Else Show As Enabled
The second new User Parameter:
- Type: Coordinate System
- Parameter Identifier: COORDSYS_Dest
- Prompt: Output Coordinate System
- Parameter: Published
-
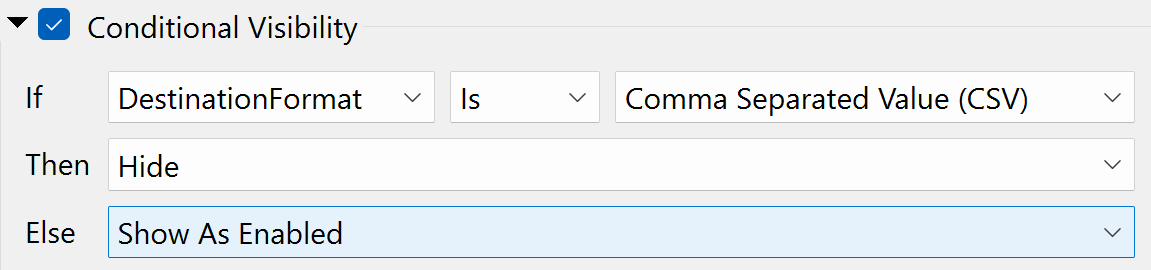
Conditional Visibility:
If DestinationFormat Is Comma Separated Value (CSV)
Then Hide
Else Show As Enabled
Conditional Visibility of workspace published parameters enables authors to determine under what condition(s) published parameters will be visible at runtime. This functionality allows authors to disable or hide published parameters that are not relevant to a particular translation based on the value selected for another user parameter. We want to set it up here so that when users choose a CSV format file, the Coordinate System parameter will be hidden, making the dialog less cluttered. For more information, see Working With Conditionally Visible Published User Parameters in FME Form.
An important point to keep in mind about the new Conditional Visibility property is that the order of parameters in the Manage User Parameters dialog matters. More specifically, when one parameter’s visibility depends on the state or value of another parameter, the dependent parameter must reside below its related parameter in the Manage User Parameters dialog. Otherwise, the visibility condition set on the dependent parameter will no longer be valid, and its If…clause will appear red.
Next, we need to add a user parameter where users can specify the name they prefer for their translated data.
- Type: Text
- Parameter Identifier: GENERIC_OUT_BASE_NAME_GENERIC
- Prompt: Destination Filename
- Parameter: Published
- Default Value: translated_data
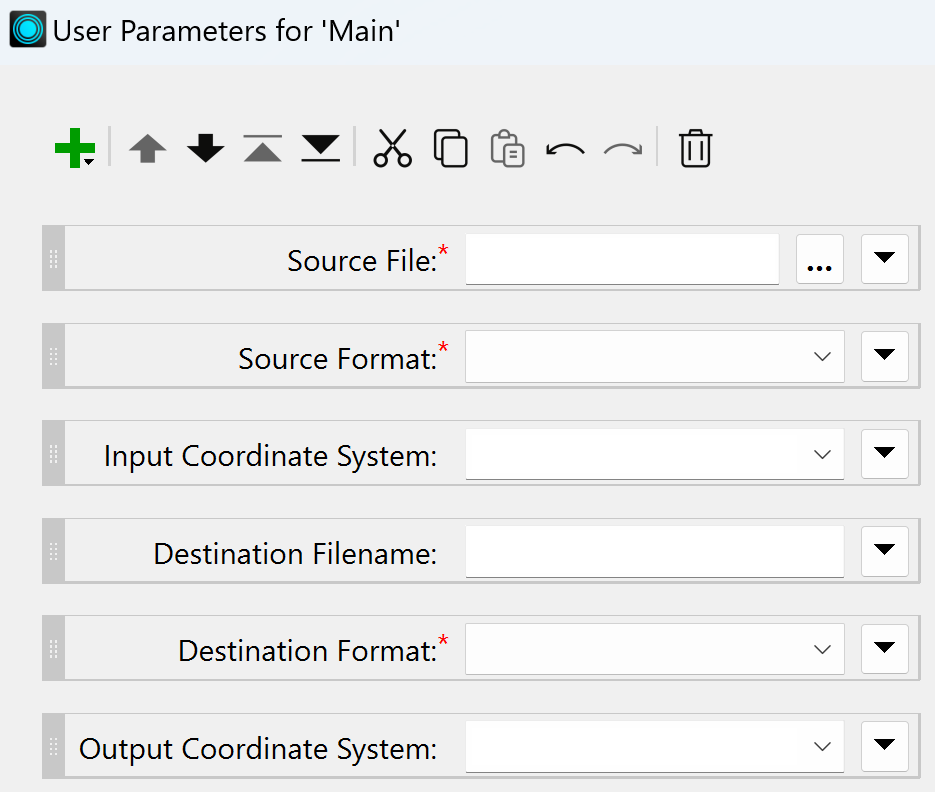
Now, there should be six user parameters in total in the Parameter Manager.
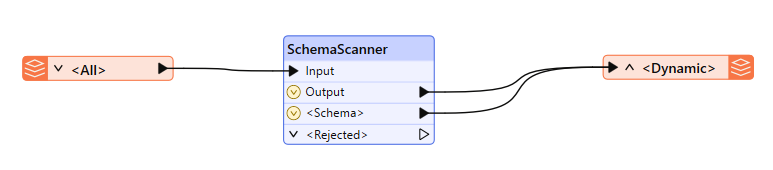
4. Add SchemaScanner Transformer
In order to ensure that all the features from the input files are correctly identified and mapped, we will add a SchemaScanner transformer. The SchemaScanner transformer scans the incoming data and determines the structure of the features. This includes identifying all the fields, their types, and the relationships between different elements in the dataset. It ensures that the entire schema is understood before writing the data out to a different format. For an additional exercise on SchemaScanner transformer, you can follow the How to Use the SchemaScanner Transformer article.
In the SchemaScanner parameters, ensure the checkbox next to Group Processing is checked and Group By is set to fme_feature_type. Additionally, set the Schema Definition Name to fme_feature_type_name.
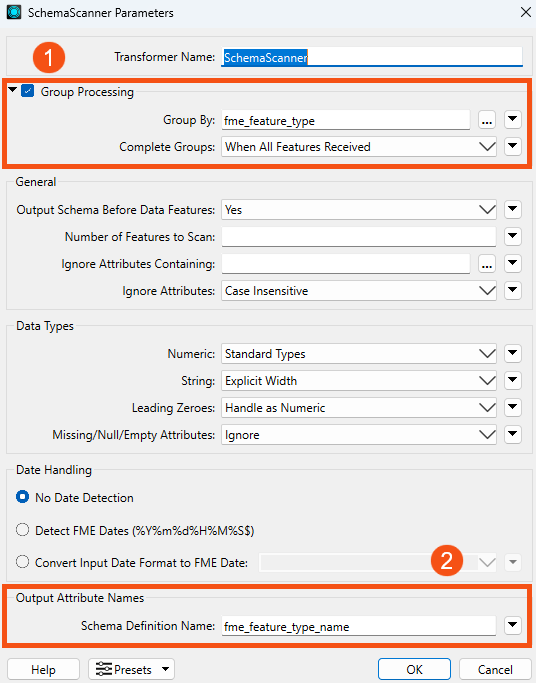
By enabling group processing, the transformer can handle each group of data independently. This is especially important for complex datasets with multiple feature types, as it helps maintain the integrity of the output.
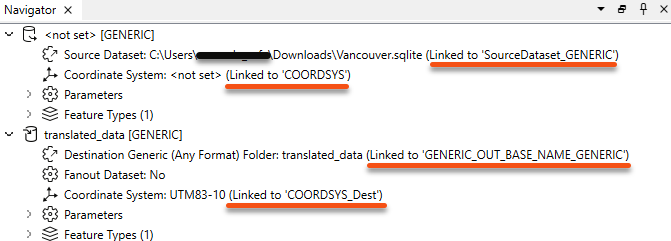
5. Link to a Parameter
The next step is to apply the parameters we created. In the Navigator window, make sure to link the Coordinate Systems of the reader and writer to their respective User Parameters. Also, link the reader source dataset and writer destination folder to their respective User Parameters. This is done by right-clicking on the parameter, selecting Link to Parameter, and then selecting the corresponding parameter.
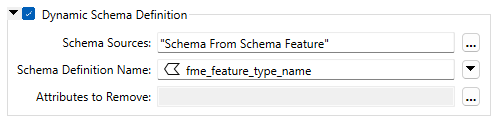
6. Adjust the Generic Writer
In the Writer Feature Type pop-up window, make sure to check the Dynamic Schema Definition checkbox. Under Schema Sources, select “Schema From Schema Feature” to instruct the writer to use the schema information from the received schema feature. Then, for Schema Definition Name, choose fme_feature_type_name. This ensures the writer applies the correct schema based on the feature type name identified by the SchemaScanner.
7. Test Workspace
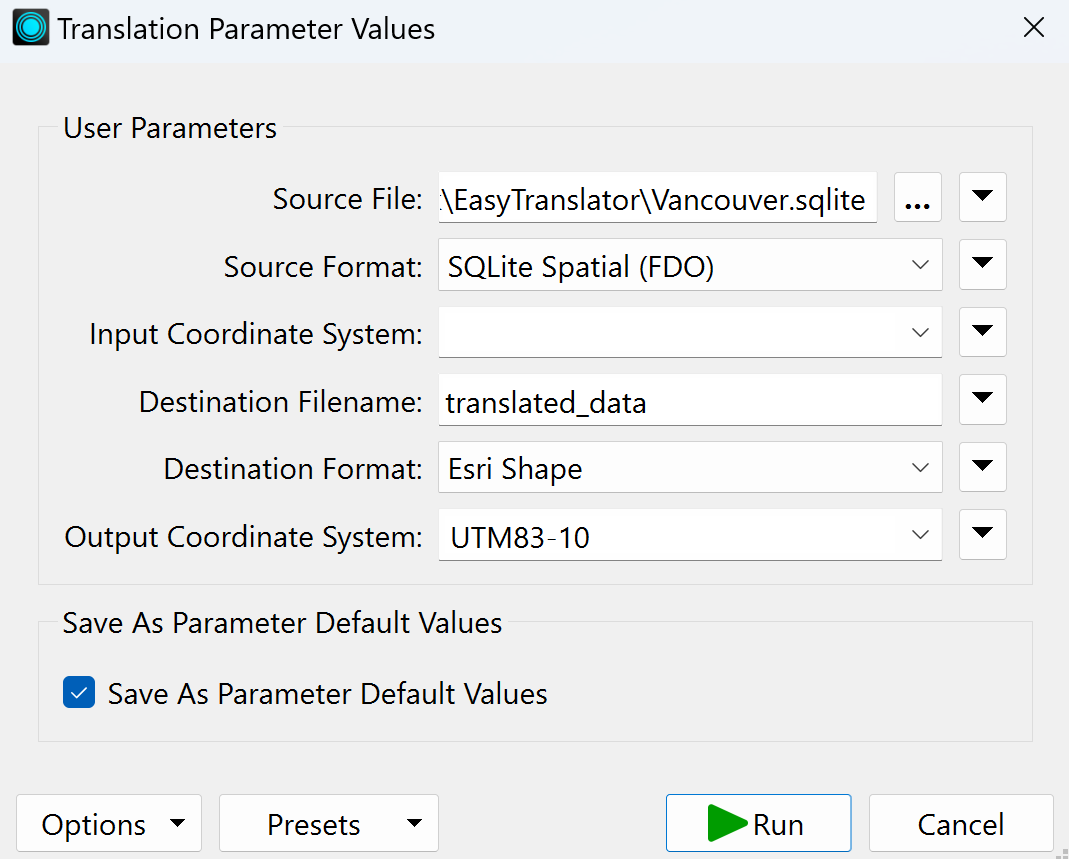
Run the workspace with Prompt to test its functionality. Click on the drop-down arrow next to the Run button and enable Prompt for Parameters.
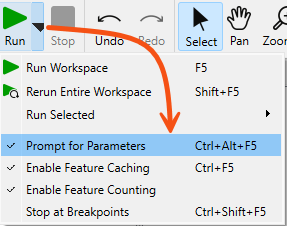
Then click the Run Workspace button. You will be prompted to enter values for the parameters. Use the Vancouver.sqlite file that you downloaded from the beginning of this tutorial as the Source File and choose one of the listed Destination Format. Once ready, click Run.
Once the workspace finishes running, check the Translation Log for errors and check the destination folder to ensure the data has been translated correctly.
8. Publish Workspace to FME Flow
Before we can create a Workspace App, we need to publish the workspace you just created to FME Flow.
Navigate to File > Publish to FME Flow. Connect to your chosen Flow connection, then either create a new repository or select an existing one. Name your workspace easyTranslator.fmw and check the box next to Upload data files to include the Vancouver.sqlite file.
For detailed instructions on publishing a workspace to FME Flow, refer to the article Publish a Workspace to FME Flow and Run It.
Part 2: Create the Easy Translator Workspace App
In part 2, you will learn how to create a Workspace App on FME Flow using the workspace you created in Part 1.
1. Create FME Flow Workspace App
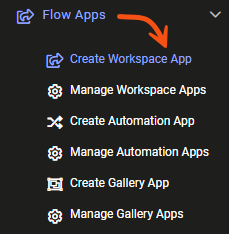
To create an FME Flow App, log into FME Flow. On the side menu bar, expand Flow Apps, then select Create Workspace App.
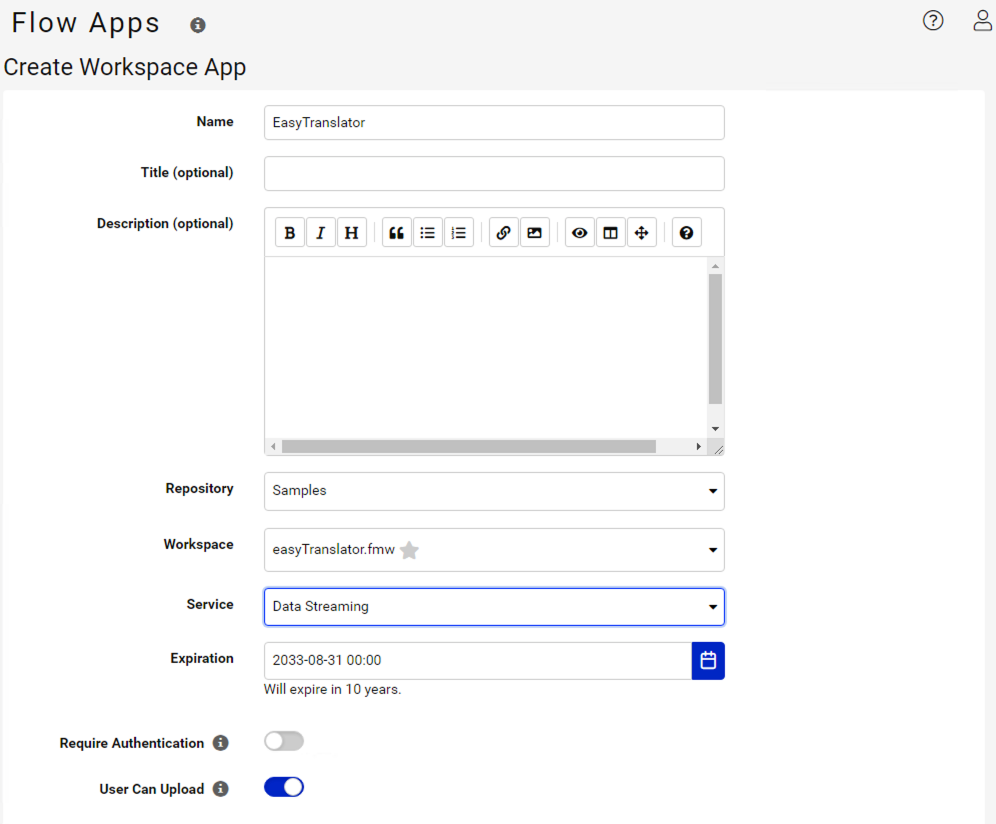
Fill out the fields according to the following:
- Name: EasyTranslator
- Repository: Your chosen repository
- Workspace: easyTranslator.fmw
- Service: Data Streaming
- Requires Authentication: Disabled
- User Can Upload: Enabled
To learn more details on how to create and customize a Workspace App, refer to the Getting Started with FME Server Workspace Apps.
Underneath the Create Workspace App, you can personalize the app's settings and appearance by simply clicking on them.

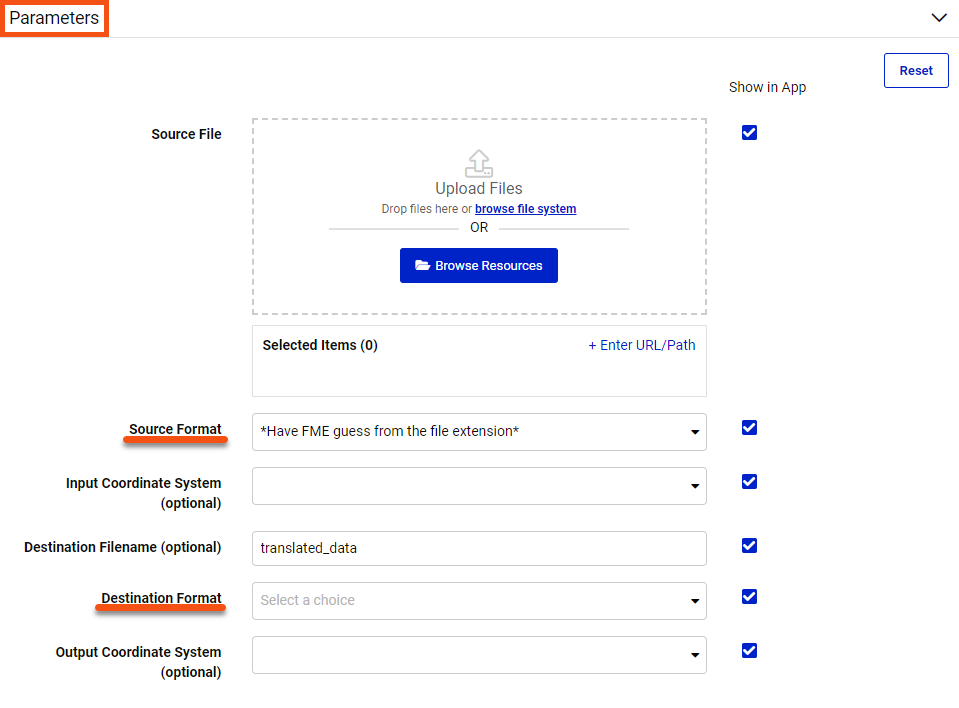
In the Parameters section (this is your Workspace Parameters), use the “Show in App” checkboxes to determine which parameters will be visible to users.
You can customize Source Format and Destination Format further by accessing the User Parameters within the easyTranslator.fmw workspace. For detailed instructions, refer to Part 1 of this article.
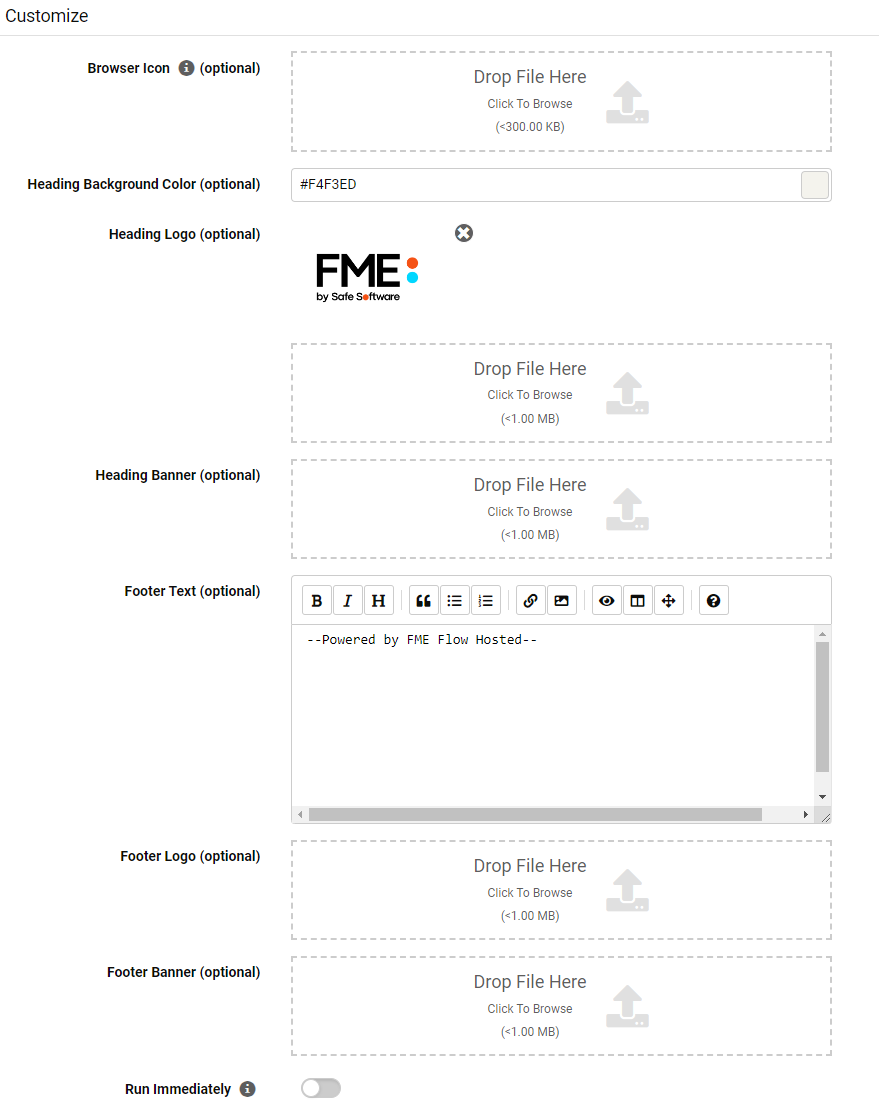
In the Customize section (this is your Customize Parameters), you can design your app's appearance by adding icons, logos, and banners.
When you've finished setting your parameters, click the "OK" button at your screen's bottom right corner.
Then, you will be redirected to a new page that contains the URL for your FME Flow App. This URL is how the app is accessed and can also be used to access the app via FME Mobile.
2. Test the EasyTranslator App
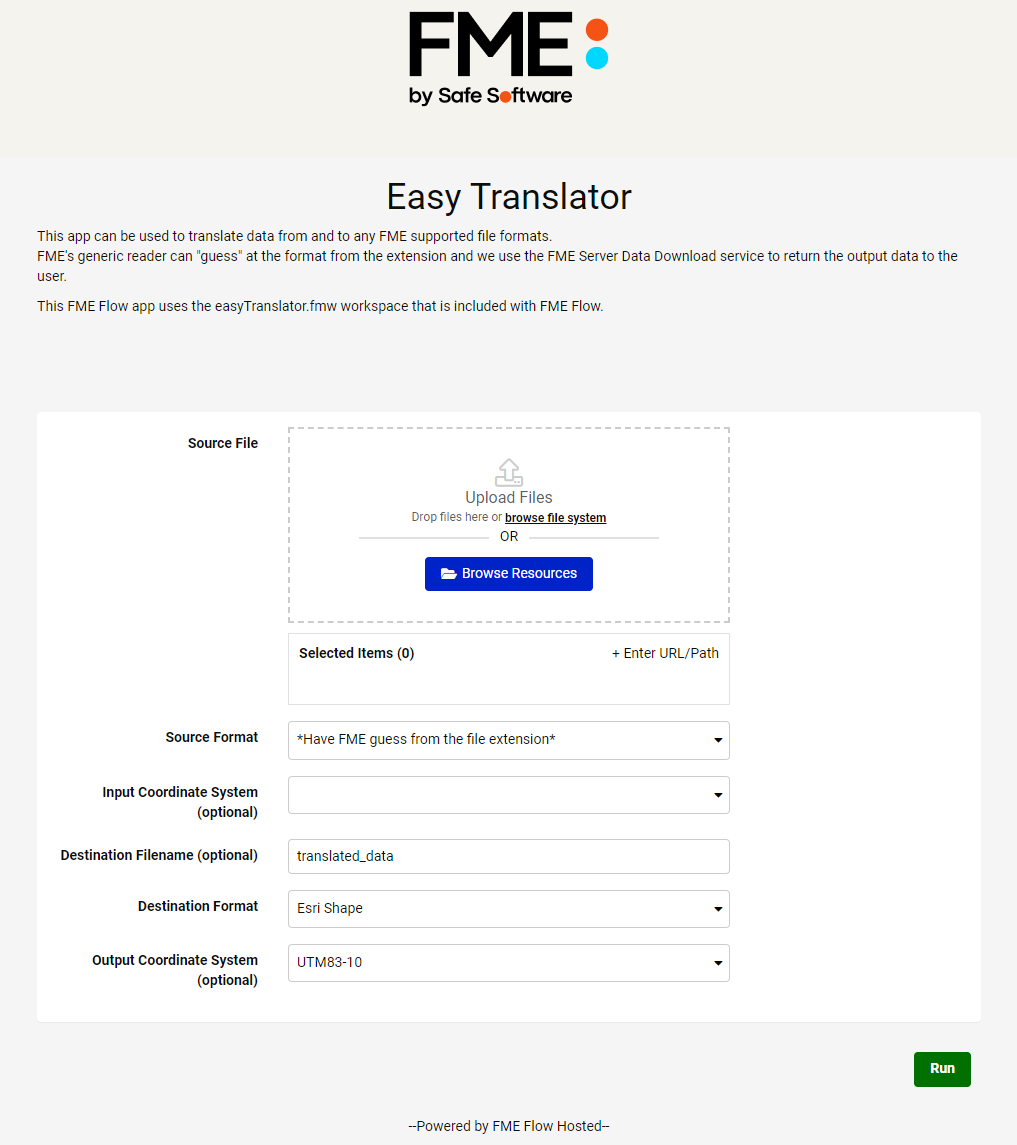
Click on the URL to open the app.
Once the app has loaded, upload any dataset to the Source File parameter. If you need sample data, you can use the Vancouver.sqlite from the Files section of this article then upload to the Source File parameter.
Change the other parameters if desired and select an Output Format. Once ready, click Run. The EasyTranslator.fmw workspace will run with the input dataset, and the output dataset will be available for download.
Congratulations, you have finished building a workspace and a workspace app for an Easy Translator! Explore our FME Support Center for more tutorials, tips, and guidelines. Additionally, visit FME Academy to explore our comprehensive training catalog for a more in-depth study!
Data Attribution
The data used here originates from open data made available by the City of Vancouver, British Columbia. It contains information licensed under the Open Government License - Vancouver.