Files
This tutorial demonstrates workflows using custom transformers and manual
API
calls to interact with Trimble Unity / Cityworks.
These workflows are still applicable to both Cityworks and Trimble Unity
Maintain,
and the overall concepts remain valid. However, the custom transformers shown
here are no longer being actively maintained, and will be deprecated in FME
2026.2.
In FME 2025.2 and newer, these workflows are supported through
the
TrimbleUnityConnector,
which simplifies authentication and request configuration.
If you are starting a new workflow, it is recommended to use the TrimbleUnityConnector
instead of building custom API integrations.
Introduction
Use the FME Platform to automate your Cityworks workflows. This robust, web-based integration allows for comprehensive access to Cityworks data and functionality across the AMS, PLL, Admin, and GIS services.
To begin managing your Cityworks operations from an FME workspace, plug your data into one of the custom transformers available for download. These preconfigured tools are ready to use out of the box. Simply provide a data source and a web connection to start automating routine tasks and integrating systems.
The WorkOrderCreator is an example of a custom transformer built for Cityworks. Use this workflow to create work orders in Cityworks with FME. This tutorial uses the WorkOrderCreator to create work orders from data stored in an Excel Sheet. A successful workflow returns an HTML table containing the newly created work order IDs.
Requirements
- A Cityworks Web Connection
- FME Form
Step-by-Step Instructions
These steps use the provided example data, "WorkOrderAddress.xlsx" (available for download in Files).
The WorkOrderCreator, like other custom tools, provides instructions for use and the required parameters in its Read Me and Help. However, it's useful to know that each Cityworks custom transformer is built with the Cityworks REST API. The WorkOrderCreator specifically uses the AMS > WorkOrder > Create endpoint.
1. Prepare a Work Order Data Source
Use the provided WorkOrderAddress.xlsx file or create a custom spreadsheet that contains "Address" and "Template ID"* columns.
*A "template ID" refers to the work order templates specific to your Cityworks instance. The template IDs used in this example may not correspond to template IDs in your Cityworks instance. Refer to your Cityworks documentation (e.g., https://<YOUR CITYWORKS INSTANCE>/apidocs) to find your own work order template IDs or consult with a Cityworks administrator. You may also use the Cityworks REST API to make a query to the WorkOrderTemplate service.
2. Start Building a Workspace in FME Workbench
Open FME Workbench and create a blank workspace. Drag the WorkOrderAddress.xlsx file onto the canvas. Or, click anywhere in the canvas and begin typing “Excel”, selecting Microsoft Excel under Readers.
Enter the path to the spreadsheet, WorkOrderAddresses.xlsx.
Before clicking OK, go into Parameters… and scroll down to the Advanced section. Ensure that the “Read Blank Cells As:” parameter is set to “Missing”. Click OK and add the Excel reader to the canvas.
3. Download the WorkOrderCreator to FME Workbench
The WorkOrderCreator is a custom transformer created by the Safe Software Lab; it is not shipped with FME. Other custom transformers and similar tools are available to browse and download on the FME Hub.
However, you can access and download the WorkOrderCreator directly from FME Workbench.
From the main menu, select Transformers > “Add Transformers…” OR click anywhere on the workspace and begin typing “WorkOrderCreator.” Select the transformer to add it to your workspace.
4. Configure the WorkOrderCreator
Drag the Sheet1 reader feature type port to WorkOrderCreator to create a connection.
Double-click on the WorkOrderCreator to configure its parameters.
For Web Connection, select your Cityworks Web Connection from the drop-down list.
In Cityworks Instance, enter your Cityworks Instance URL.
Select the “Template ID” attribute for Work Order Template ID.
Entity Type is “WHYDRANT”
Entity Type to be included with every WorkOrder > Create request. Once again, you'll need to refer to your Cityworks instance or to your administrator to identify the entity types specific to your organization. "WHYDRANT" is specific to the Cityworks instance used for the tutorial. Just like the template IDs, this value is for example only, and your Cityworks instance may not have this specific entity type.
Additional Request Parameters can include any other available API parameters*. Since the WorkOrderCreator doesn't offer an address parameter, we will use Additional Request Parameters to include the spreadsheet's address data.
Click the ellipses (...) next to Additional Request Parameters to open the Text Editor window. Append the following text to the existing string:
,"Address":"@Value(Address)"*Find the complete list of parameters available for your Cityworks work orders by querying the WorkOrderTemplate service endpoint. If you choose to use additional parameters, each parameter should be JSON-formatted. i.e., double quotation marks (") surrounding each key, with a colon (:) between keys and values. Each key-value pair should be separated by a comma (,). Do not include curly braces unless using nested objects.
Example Additional Request Parameters:
"Address'':''1234 Fake St.'',''City'':''NowhereVille''The completed WorkOrderCreator parameters should resemble the image below:
5. Create an HTML Report
After a request is completed, like creating a work order, Cityworks returns information to FME. This information can be used downstream in other processes. In this example, we'll use the information returned about each new work order to create a report.
Add an HTMLReportGenerator transformer to the workspace.
Connect the WorkOrderCreator output port to the HTMLReportGenerator input.
Open up the HTMLReportGenerator. Under Page Contents, select “Table” from the drop-down menu. Click to the right side of the parameters to load the Table parameters.
In Column Settings, we'll format a table to display Cityworks work order data.
For Column Contents, add the “_work_order_id” and “_address” attributes.
Give descriptive titles under Column Name.
6. Display Results in HTML
Add an HTML writer by typing in the workspace or selecting Writers > “Add Writer…” from the main menu.
Name your output file (e.g., "ExcelWorkOrders.html") and leave the other parameters default.
Attach the HTMLReportGenerator output port to the HTML Writer. The workspace is now fully connected.
7. Run Workspace to Create Work Orders
Ensure “Enable Feature Caching” is checked. Feature caching stores data so you can inspect it at different stages of translation. If something goes wrong, this is a great way to check where your data is getting stuck.
Hit Run from the ribbon menu and watch FME create work orders!
8. View HTML Results
Find your written HTML file in a file explorer. Open the HTML file in a browser to view the results.
The "Address" column reflects the spreadsheet data.
The "Work Order ID" contains a unique value for each work order created by FME.
If the Work Order ID column is empty, your FME workspace was likely unsuccessful. Inspect the workspace feature caches for errors (the WorkOrderCreator may return errors from Cityworks) and review each tutorial step.
9. View Results in Cityworks.
Open your Cityworks Instance in a browser. Search each work order ID.
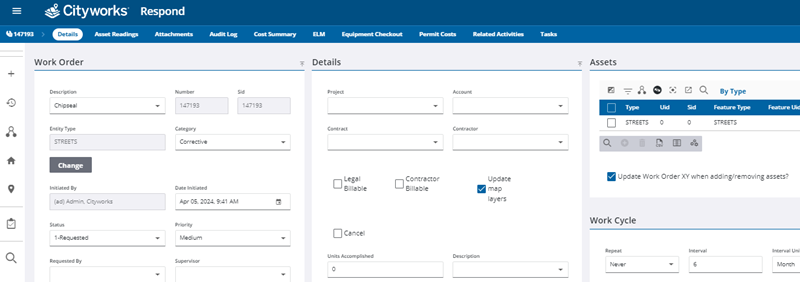
A work order created by FME viewed from Cityworks Respond. This example used the STREETS entity type.